hashnode-blogs
Forms and Input Elements in HTML 📄
In real life, forms are used to take information from the user/person. For example forms for job applications and entrance examinations.
This is what form on a paper looks like:
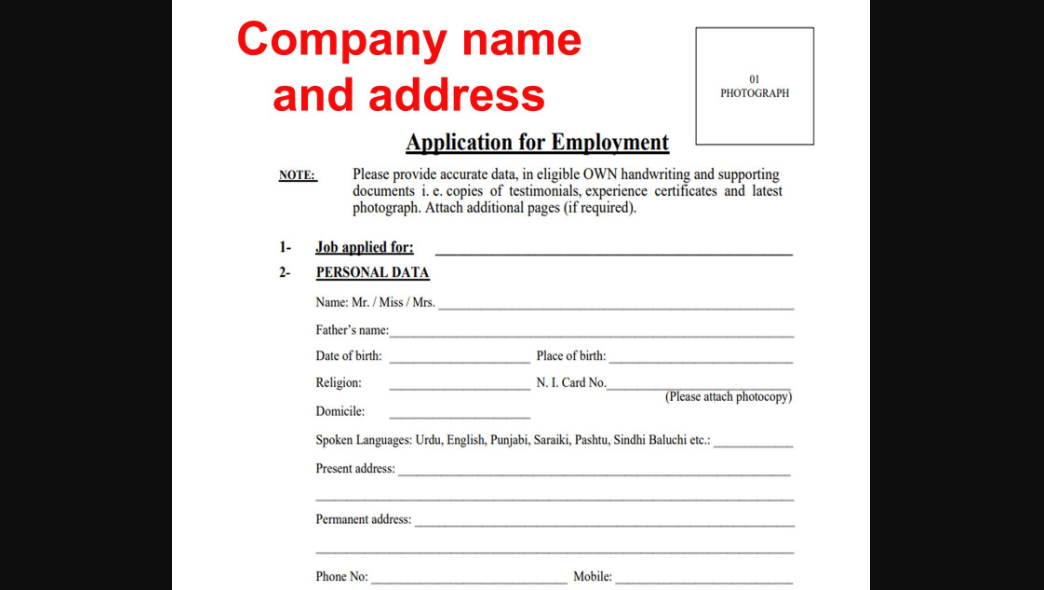
Here, you will notice blanks that need to be filled with appropriate information.
So, for these blanks, there are input elements in HTML.
<input />
input tag is an inline-level tag.
Here is how a form in HTML looks like
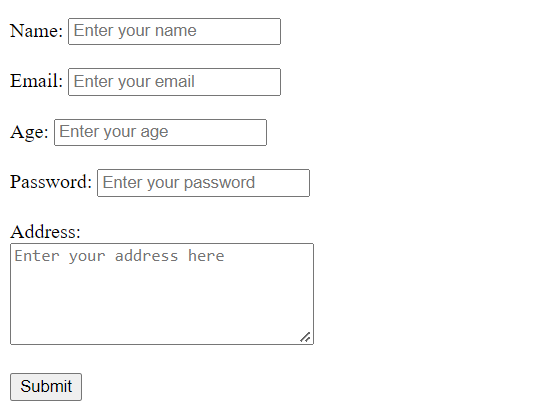
Various Input elements - Explained ⚙️
Information can be of various types. For example text, number, email address, password, date, time, etc.
-
For text 🔤
<input type="text" placeholder="please enter your name" > -
For number 🔢
<input type="number" placeholder="please enter your age" > -
For email address 📧
<input type="email" placeholder="please enter your email address" > -
For password 🔑
<input type="password" placeholder="please enter your password" >⚡password and email are type of texts, so why HTML have different types for them?
The answer :
-
type
passwordhides the text you enter. -
type
emailperforms check whether the text is email or not.
-
-
For date 📅
<input type="date" placeholder="please enter your dob" > -
For time ⌚
<input type="time" placeholder="please enter sunrise time" > -
For file 📁
<input type="file" > -
For longer texts ( ex: feedback, or remarks) 📃
  <textarea name="textarea" id="textarea" cols="30" rows="10">
  </textarea>
⚡
colsandrowsare used set width and height of the container.
Elements/tags for Options
-
select
use
<select> </select>tag, if you have a lot of options to select from:<label>Select:</label> <select> <option value="option1">Option 1</option> <option value="option2">Option 2</option> <option value="option3">Option 3</option> <option value="option4">Option 4</option> <option value="option5">Option 5</option> </select>The preview:
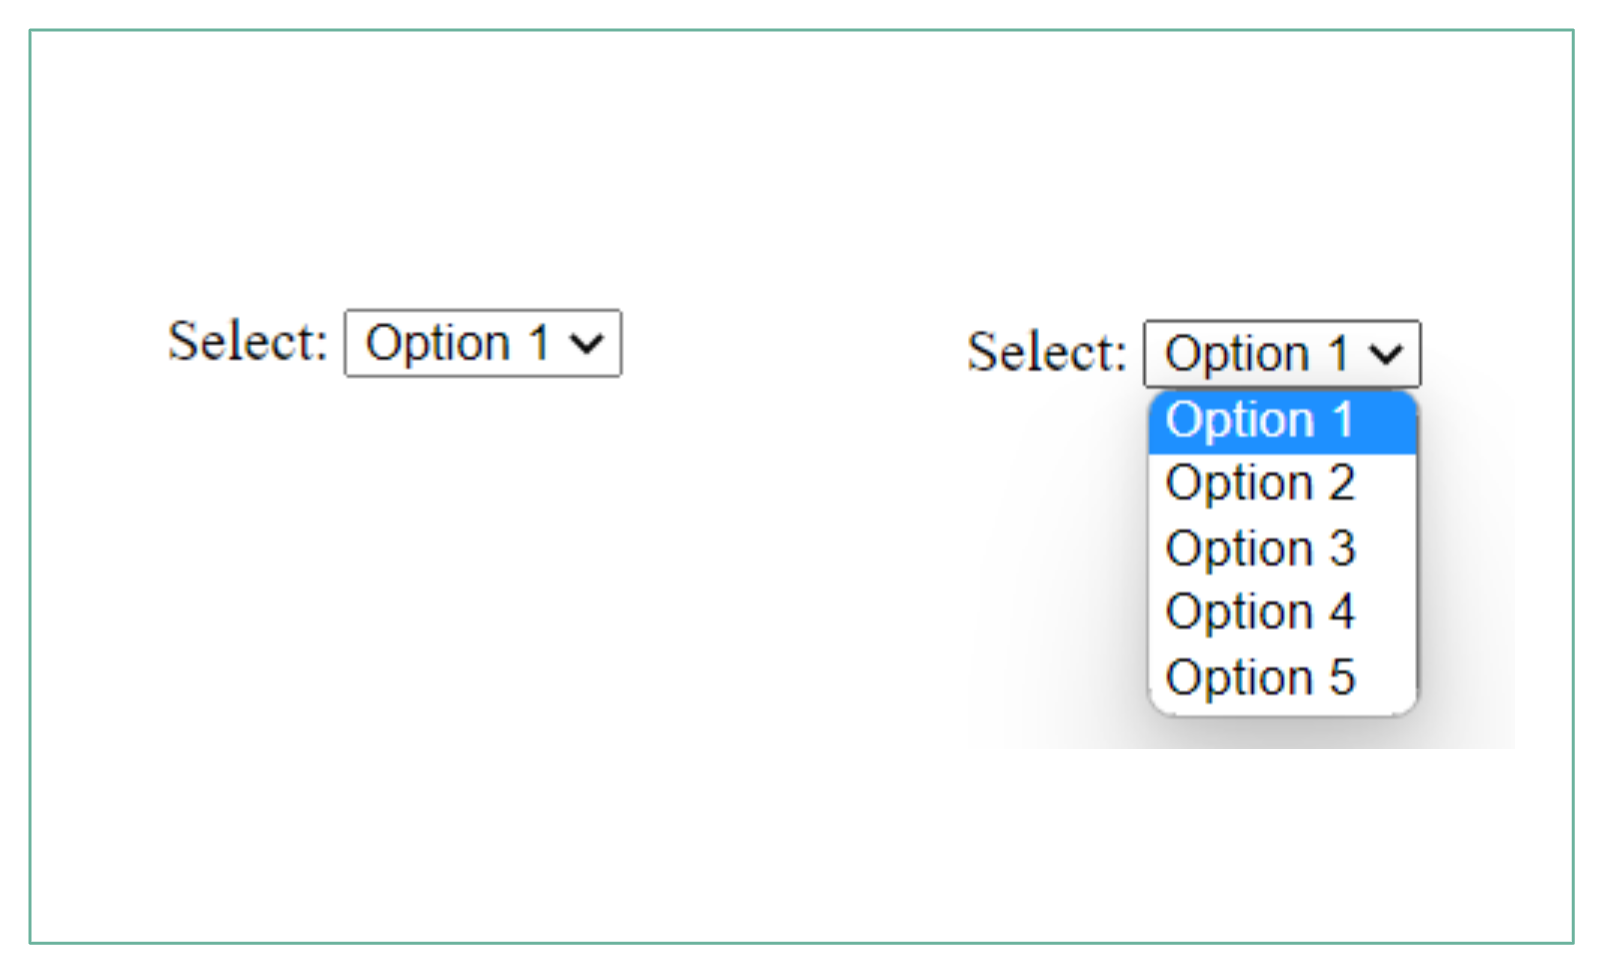
-
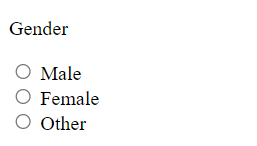
type=”radio”
use
inputelement withtype="radio"when you have fewer options and can easily be shown on screen without making the UI ( user-interface/screen) look ugly👍.<p>Gender</p> <input type="radio" name="gender" value="Male"> <label>Male</label> <br> <input type="radio" name="gender" value="Female"> <label>Female</label> <br> <input type="radio" name="gender" value="Other"> <label>Other</label> <br>The preview:
⚡ All these input elements are connected to each other through
nameattribute. That’s why you will notice them working as a system.
-
type=”checkbox”
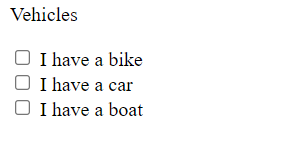
when you have fewer options and you want the user to select multiple options, you can use checkboxes.
  <p>Vehicles</p>

  <input type="checkbox" name="vehicle" value="Bike">
  <label> I have a bike</label><br>

  <input type="checkbox" name="vehicle" value="Car">
  <label> I have a car</label><br>

  <input type="checkbox" name="vehicle" value="Boat">
  <label> I have a boat</label><br>
The preview:
Complete code - for a form 💻
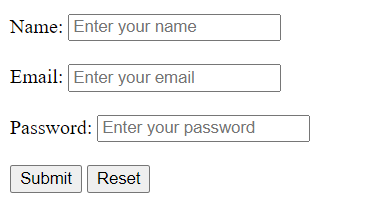
We need to wrap all the input elements inside <form> </form> tag like this
<form>
    <label for="name">Name:</label>
    <input
        type="text"
        id="name"
        name="name"
        placeholder="Enter your name"
        required
    >
    <br>

    <label for="email">Email:</label>
    <input
        type="email"
        id="email"
        name="email"
        placeholder="Enter your email"
        required
    >
    <br>

    <label for="password">Password:</label>
    <input
        type="password"
        id="password"
        name="password"
        placeholder="Enter your password"
        required
    >
    <br>

    <input type="submit" value="Submit">
    <input type="reset" value="Reset">
</form>
The preview:
Attributes explained:
-
if
forattribute in label tag is same asidattribute in input tag, then on clicking the label text on webpage corresponding input element get focused ( you will see an outline around that input element ). -
requiredattribute will not allow you to submit the form, if that corresponding input element is not filled. -
placeholderattribute is used to show helper message to the user. -
nameattribute is used by backend developers to identify the information. -
type="submit"creates a button withvalueas its label. Form get submitted when this button is clicked. -
type="reset"also creates a button withvalueas its label. All the value is reset when this button is clicked.
Read more about Forms - Official Docs
Why and how we use forms - a technical dive 🏊
Form is used to take information from the user.
The steps are:
-
Creating a form using HTML
-
Handling the form submission (when submit button is clicked) using javascript.
-
data is sent to the backend.
-
In the backend, we validate the data to determine if it is correct or not,
-
we send back errors to the frontend ( on the webpage ) if there are any
-
if the data is all correct, we store it in the database and send a success message to the frontend
-
and the frontend shows the user a congratulations message
🚩 We will be learning more about forms and data in JAVASCRIPT.
⚡ There are no hard and fast rules in design. Observe everything and design your own way through it.
Exercises 🏌️
Here are some free and worth practicing exercises on w3schools.
Source codes
-
Download the source code of this blog
-
Check out the source code on GitHub.
-
Preview the output of this blog.
In the next blog, I will be making a simple project using HTML5 to summarize this whole blog-series.