hashnode-blogs
Basic CSS Selectors 🪝
When it comes to styling a webpage ( basically an HTML page ), you have to choose elements from an HTML file and then style them one by one.
In this blog, we will learn about the different ways we can select elements and I will also tell you why we have more than one way to do that.
Writing styles in a separate stylesheet file is much more convenient, easy, scalable, and flexible.
Read this blog, if you don’t know how to connect your stylesheet to your HTML file.
Get ready with your CSS file connected to an HTML file both of them opened in your favorite editor and the HTML file opened in a browser.
Let’s say you have a paragraph in HTML
<p> Hii there, I hope you are doing fine. </p>
and you want to style it using CSS.
So, you will select this element in CSS and will apply styles on it.
p {
 color: green;
}
The basic structure of the CSS file needs a selected element to apply styles on. Without choosing an element you can’t apply styles ( And it also does not make any sense).
Three basic selectors 👈
-
Element selector ( you write the name of the element ).
-
ID Selector ( you write the name of id of that particular element with a prefix of
#, ex#box1) -
Class Selector ( you write the name of class of that element with a prefix of
., ex.box).
Element Selector
When you apply styling on an element name, it styles each and every element in that HTML file.
For example:
in HTML file
<p> Hii there, I hope you are doing fine. </p>
<p> Hii there, I hope you are doing fine. </p>
<p> Hii there, I hope you are doing fine. </p>
<p> Hii there, I hope you are doing fine. </p>
in CSS file
p {
 color: green;
}
This code will make the content of each paragraph element green.
The preview:

So, what to do if you want to style a particular element,
use ID selector.
ID Selector
ID should be and is unique in an HTML file. So we use ID selector to choose that particular element.
First, give a unique ID to an element and select that element using its ID in CSS.
in HTML file
<p id="quote"> This is an awesome quote </p>
in CSS file
#quote {
 color: red;
}
Class Selector
When you have a group of similar elements according to your use case, you need to select them using class selector.
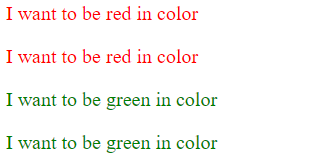
👉 Let’s say, I have a use case, in which I have four paragraphs two of them need to display green, and the other two need to display red.
One solution can be to use ID selector and style each paragraph individually, but it’s not flexible, what if I had 20 paragraphs, out of which 10 should be green and the other should be red?
For this type of use case, we use class selector. Classes don’t need to be unique in an HTML file,
Here is how we assign a class to an element
<p class="red"> I want to be red in color </p>
For the above use case, the solution could be:
in HTML file,
<p class="red"> I want to be red in color </p>
<p class="red"> I want to be red in color </p>

<p class="green"> I want to be green in color </p>
<p class="green"> I want to be green in color </p>
in CSS file
.red {
color:red;
}

.green {
color:green;
}
The preview:

Other Useful selectors
-
Child Selector
-
Descendent Selector, etc
Child Selector >
It can only select the direct child element of a parent element.
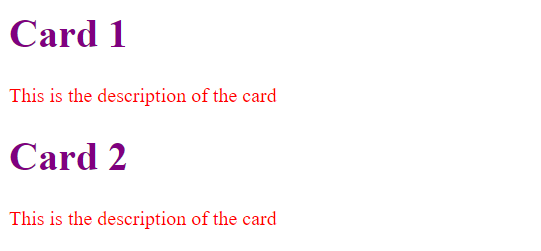
Let’s say you are designing some cards:
in HTML file:
<div class="cards">
    <div class="card">
        <h1> Card 1 </h1>
        <p> This is the description of the card </p>
    </div>

    <div class="card">
        <h1> Card 2 </h1>
        <p> This is the description of the card </p>
    </div>
</div>
in CSS file
.card > h1 {
  color: purple;
}

.card > p {
  color: red;
}
Here, you will notice the chaining of selectors with > operator.
.card > h1 means select the h1 tag which is a direct child of an element that has a class of card
The preview of the above code:

Descendent Selectors
It can select the child element, grandChild element, grandGrandChild element ( that’s what the word descendent means ).
It saves us from naming mesh.
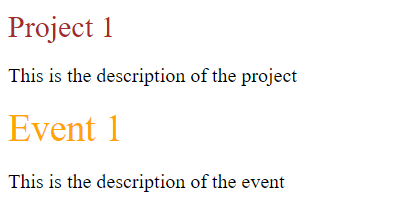
Suppose you are designing two cards, the first one is projectCard and the second one is eventCard and both cards have a title and you want to style each title uniquely.
So you can use the descendent selector otherwise you have to come up with a new name for both titles in order to style them separately, for ex eventCard_title and projectCard_title .
Let’s see the code for descendent selectors:
in HTML file
<div class="projects">
    <div class="projectCard">
        <div class="header">
            <div class="title">
                Project 1
            </div>
        </div>
        <div class="body">
            <p> This is the description of the project </p>
        </div>
    </div>
</div>

<div class="events">
    <div class="eventCard">
        <div class="header">
            <div class="title">
                Event 1
            </div>
        </div>
        <div class="body">
            <p> This is the description of the event </p>
        </div>
    </div>
</div>
in CSS file
.projectCard .title {
  color: brown;
  font-size: 24px;
}

.eventCard .title {
  color: orange;
  font-size: 30px;
}
The preview:

Read about more CSS Selectors on W3Schools.
Order of CSS Selectors ⚖️
What if you have more than one styling pointing to the same element?
What if you gave an ID and a class to an element and applied different styling choosing both selectors?
Answer: In this case ID selector will have preference.
Read more about CSS Specificity on W3Schools.
Exercises 🏌️
Here are some easy, and worth practicing exercises on W3Schools.
Source Codes 💠
-
Click here to download the source code of this blog.
-
Here is the source code of this blog on GitHub.
-
Live Preview of the codes in this blog.
In the next blog, we will learn about different properties of texts on which we can style them.